
Monkey is very happy that his new quilt is finished. He loves dragging it around the house and taking it for rides in the car.

Either that or he is playing Legos on it like his big brother. (The orange is brighter than it shows in the pictures. Minky is hard to photograph.)

It is folded on his bed when he is not using it. I love seeing it so close to his Monster Alphabet quilt.

They were both made with the Silly Gilly fabric I purchased in May 2015. I still have enough of this fabric for another 2 quilts.

I love making stripe quilts.

They are simple to piece and fun to quilt. I quilted each stripe cut the same width the same. It turned out so cute!

I used markings on the chevron fabrics to keep things spaced evenly.

Needless to say that Monkey loves the orange minky on the back.

I named this quilt Monster Train because of the cute monsters on the train stripe.

The binding is the same dark purple as the Monster Alphabet quilt.

Quilt Stats #184
Name: Monster Train
Pattern: 1, 2.5, 4, and 6 inch finished stripes
Fabric: Silly Gilly
Amount Used:
Size: About 41 by 56 inches
Batting: Frankensteined Hobbs 80/20
Date Finished: 2016

We love how it turned out!
XX,
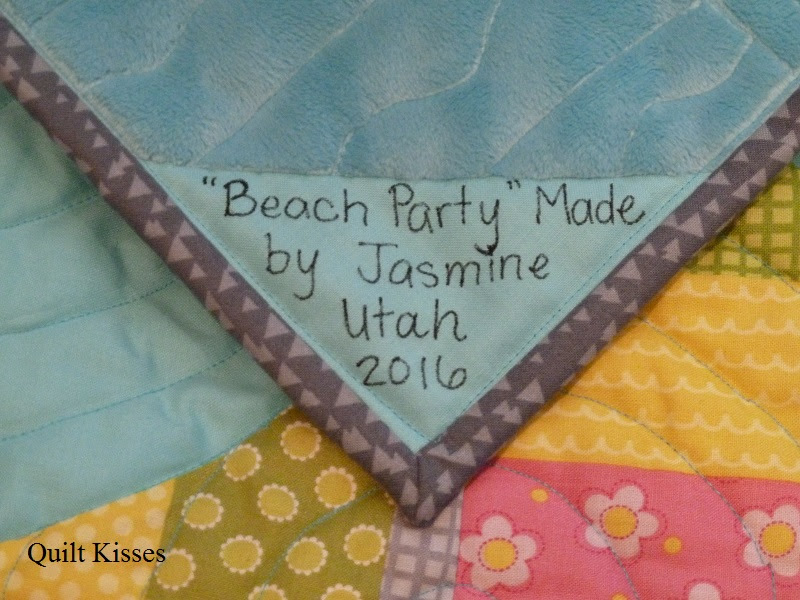
Jasmine
P.S. I will be linking up with some of the fun parties on my sidebar. Check them out to see more inspirational quilts.