Tuesday, March 31, 2015

A FMQ Light Bulb Moment


I have been doing a lot of reading in preparation for my Free Motion Quilting Basics classes which I teach at my LQS.  I have especially been reviewing these books.  


After reading through First Steps to Free-Motion Quilting by Christina Cameli a second time, something finally clicked.  Christina recommends quilting away from you in a counter-clockwise direction.  She says that this makes it easier to see what you have already quilted, so you don't run into your previous stitches.  

It was her words of a counter-clockwise direction that finally sunk in.  That is backwards from how I have always quilted with all over designs like meandering, loops, and swirls.  When piecing or quilting with the walking foot whatever you have just sewn goes behind the needle.  When quilting away from you, what you have just quilted is in front of the needle and you are pulling the quilt towards you.  Completely backwards!  

I believe that most techniques are worth trying at least once, so I have been experimenting quilting away from me for the past month since my first class.  It was difficult to wrap my mind around quilting backwards.  However, I have to say that I now absolutely love it!!!  

I have taken some pictures along the way to show how much better the view is when quilting away from you.  

In the following picture I am quilting my quilt Cherish with a flower design from Christina's second book (which she calls Cherish).  I have just finished one flower and have limited space between flowers to quilt before starting the next flower.  This is what my view would normally look like when quilting towards me.  


In this next picture I have drawn over what I just barely quilted with black and my previous quilting in blue.  


Now look at the difference when quilting away from me.  


It is much easier to quilt between those flowers.  


Especially when my cream thread blends in so well with the yellow.  

And my quilting machine (a Tiara) has a great view.  Imagine the difference it makes when quilting on a domestic sewing machine.  


There is a lot more machine blocking the view on a domestic.  And I have had crinks in my neck from peering around behind the needle before.  

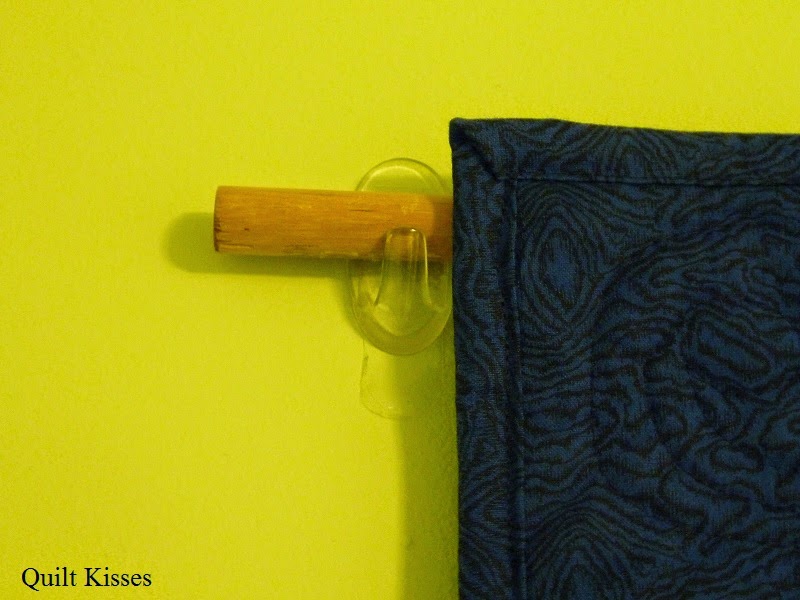
I have also quilted away from me on my husband's quilt and my brother's quilt.  In the picture below you can see I am quilting away from me and to the right up into the corner.  


I have to say that not only is the view better, but I have less drag on the quilt itself.  I am now changing the direction I quilt an all over pattern.  

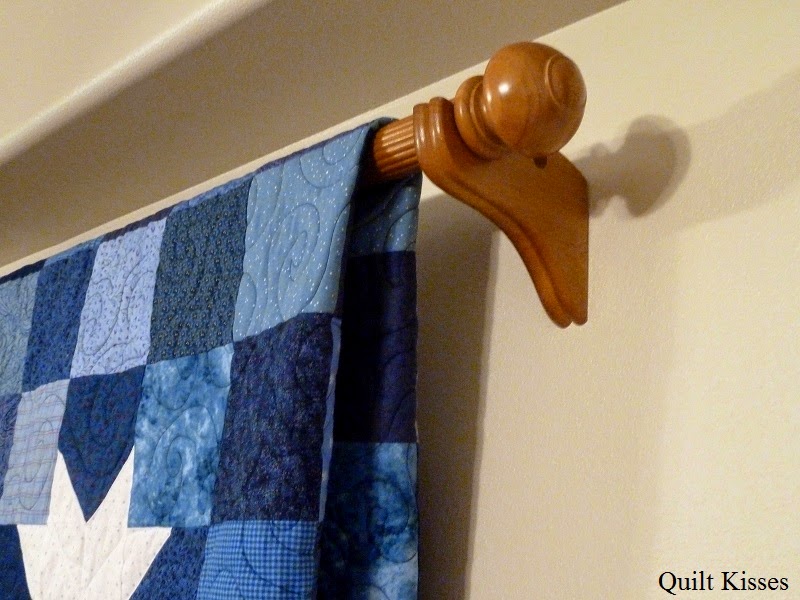
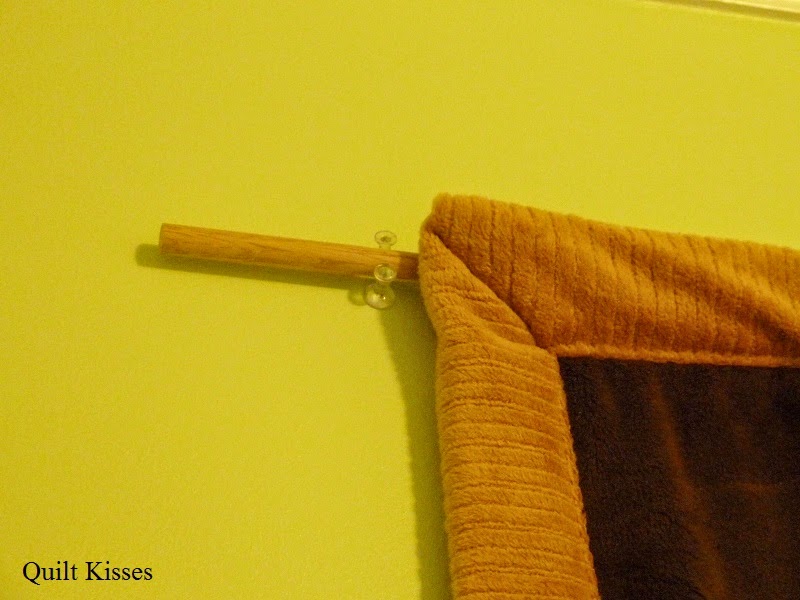
I will say that I think this only makes a big difference on all over designs when sitting down to quilt.  When quilting in rows like on this blue baby quilt, I still quilt one row away and the next row towards me.  (That keeps the design more continuous.)


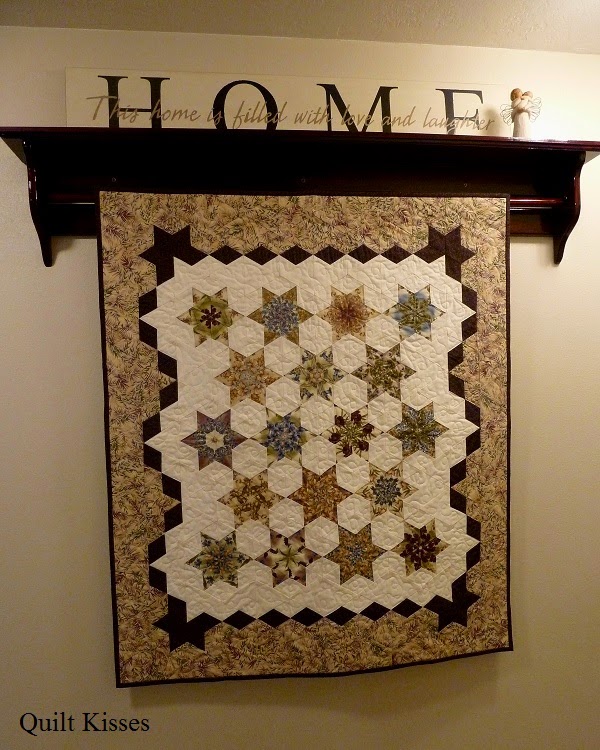
I also don't think it would make a difference on block designs, because you have to quilt the entire shape anyway.  


In my second Free Motion Quilting Basics class last Saturday, I encouraged my students to try quilting away from them.  I think they liked the view better as well.  

As a side note, I just wanted to say that it was so nice teaching the same class more than once (same class different students).  This time I went in with more realistic expectations for what we could cover during the class.  I spent the first hour going over background information: batting, needles, thread, basting... Then went over starting to quilt and tension.  They then worked to get good tension on their machines.  After which I talked about doodling and different quilting designs.  Then they doodled before moving on to quilting those designs.  While I still wish the class could go longer than three hours, this is what the manager feels is best.  I will teach the basics class one more time next month.  I have a part two where we will quilt a baby quilt scheduled for next month as well, however no one has signed up for that yet.  

My students really liked my handouts.  Only one of them had previous experience with FMQ, and she especially loved the handouts showing multiple designs.  


I am looking forward to my next class and continuing to quilt with a better view!  Please tell me that I am not the only one who didn't know this.  What direction do you normally quilt?  

XX,
Jasmine

P.S.  I will be linking up with some of the fun parties on my sidebar.  Check them out to see what other quilters are doing.  

Friday, March 27, 2015

Pinwheels in the Wind: A Finished Quilt


I am happy to say that my brother W's quilt is now finished.  I talked more about the piecing and inspiration in my previous post.


I was unable to find a plain cream minky for the backing, and the green I purchased didn't work.  So I bought an off-white minky for the backing.  (It doesn't photograph that well.)


It is just a little bit lighter than the Kona Snow in my label.


I decided to name it "Pinwheels in the Wind" because the swirly quilting reminds me of wind.


This was the largest I had quilted spirals. A lot of the quilting lines are an inch apart.  Some of the spirals  have hooks and some don't.  I just quilted whatever fit the space.  It is so cuddly and looks really neat on the minky backing.


Because of the lighter backing, I chose one of the light greens for the binding.  Totally love how soft it looks.


And so does Cheetah.  He had to test it out when I was trying to take a picture of the backing in the sunlight (too bright).


Reminds me of his little brother Monkey and the Through the Woods quilt.  Lol.


Cheetah has told me at least three times this week that he is so glad I got over my fear of minky.  :D

I found my boys fighting over Pinwheels in the Wind yesterday, so I told them to go get their own minky backed quilt.  It's probably not surprising that they think they need more minky backed quilts.

I will be sure to tell W that if he doesn't like it, he can just give it back.  My boys will use it!


Quilt Stats #137
Name: Pinwheels in the Wind
Pattern: 16 inch pinwheels inspired by Val's quilt
Fabrics Used: cream and greens from stash with a minky backing
Amount Used: 7 yards
Batting: Hobbs 80/20
Size: About 58 x 76 inches
Date Finished: March 2015
What I learned:
  • Take fabric from the quilt top with you when buying the backing even if you know what you want.  (I bought the wrong green when my favorite LQS didn't have the cream.)
  • I can quilt large swirls/spirals.  
  • Using a magazine to flatten a block after it's pressed really works.  
Now I just have two sibling quilts left.  One for my sister K and one for my brother V.  Then I may start giving quilts to my nieces and nephews when they get married. (There are more than 40 and one of them is engaged.)  

XX,
Jasmine

P.S. I will be linking up with some of the fun parties on my sidebar.  There is something fun for every day of the week.  

Wednesday, March 25, 2015

Pinwheel Quilt in Progress


A year ago, my sister-in-law came and picked out fabric in my stash for me to make my brother W a quilt.  She selected this cream and these green fabrics.  I am finally getting around to making it.  :)

The quilt is inspired by my friend Val at Val's Quilting Studio.   Last May she posted about a darling pinwheel quilt  she had made.  I immediately knew it would be good for my brother.


It goes together really fast, because my pinwheels finish at sixteen inches.  (Slightly bigger than Val's.)  I changed it up by using the background in the pinwheels, adding cornerstones between them, and making my borders slightly larger (3 inches finished.)  I spent one day making the blocks, and the next piecing the top.


I plan on having a minky backing and quilting it in big swirls/spirals.  I really love simple quilts!

And have you seen this pressing tip?  You put a magazine on your item while it is still hot from the iron and leave it on until it's cool.  (Read more about it here at Cluck Cluck Sew.)


It really helped my seams to lay flat, even where all eight points meet.


While I wouldn't use it for everything, it was perfect for pressing the final seam on the pinwheels.

XX,
Jasmine

P.S.  I will be linking up with some of the fun parties on my sidebar.  There is something fun for every day of the week.

Tuesday, March 24, 2015

Bias Binding Tutorial


I always like the look of plaid and stripe bindings on the bias, and bias bindings are the best for sewing around curves.  I know there are lots of ways to cut the binding on the bias which include folding the fabric in interesting ways, but I keep it simple and just cut through one layer of fabric at a time.  I thought some of you would like to see how I make my bias bindings.

Materials:

  • Binding Fabric--I usually purchase a little extra.  On a quilt this size (40 x 50 inches) I normally purchase 1/2 yard of binding.  For the bias binding I purchased 2/3 yard of binding.  It was only six inches more, and made it a little bit easier.  Note:  The smaller the piece you are cutting, the more seams there will be.  
  • Rotary Cutter
  • 24 inch ruler with 45 degree angles marked (My favorite is the Big Daddy designed by Trudie Hughes.)


This is how I calculate the number of strips needed for bindings:

  1. Calculate the perimeter of your quilt (length of side 1 + side 2 + side 3 + side 4) and add 10-15  more inches to cover the extra fabric needed for corners and joining the ends.
  2. Divide that number by the length of your binding strips.  (Most of the time I say 40 inches because you loose a couple inches when joining the ends on the 45 degree angle, but for this bias binding my length was 31 inches.)
  3. Round that number up to get the number of strips.    

I will use this Forest Friends quilt for an example:
  1. 40 + 40 + 50 + 50 + 15 = 195 inches
  2. 195 / 31 = 6.3 strips
  3. 7 strips are needed :)
Notes: 
  • On some bias bindings you may have some longer and shorter strips.  So instead of dividing by the length of you strips, you can keep a running total of the length of all your strips added together.  
  • I know that adding the extra 10-15 inches may lead to some extra binding left over, but I would rather have too much than too little.  I rarely run out of binding fabric when I use these calculations.  
Now on to cutting the binding.  :D  You may want to iron your fabric with a little spray starch before cutting, but I don't always do that.  

1.  Square up the right and left sides of your fabric.  Unfold it on your cutting mat.  


2.  Line up the 45 degree marking on your ruler along the selvage.  It will not reach edge to edge.  Cut as far as you can along your ruler.  


3.  Keeping your rotary cutter in place, slide the ruler along your cutting line so that a different 45 degree marking lines up with the left edge of your fabric.  Finish the first cut.  


4.  It now looks like this.  Set the bottom left triangle aside for now.  (You can cut into it later if you still need more length for your binding.)


5.  Rotate the larger piece so you can cut along the entire length of the bias edge.  


6.  Using your ruler cut your strips the width you want to use.  I cut mine out at 2.5 inches.  


7.  Measure the length of your strip.  Mine was 31 inches along the bottom edge.  Use this in the calculations I mentioned above.  These strips already have your 45 degree angles cut on the ends ready for piecing.  

8.  Continue cutting strips along the bias edge.  

9.  I was able to cut six strips out at the 31 inch length.  This was not enough, so I cut one strip into the triangle section.  I then had to trim one end to the 45 degree angle.  


Note:  Because I only needed 6.3 strips I knew I would still have enough with one that was a little bit shorter.  

 This is what you will have when you are done cutting.   


10.  Take your strips to your sewing machine and line them up like this.  The triangle tips should stick out about a quarter inch.  


11.  Sew from point to point (along the red line I drew).  The tape you see in the center is in line with my needle making this easier.  


12.  Press and sew your binding strip together the same way you would any other binding, but be careful about stretching it too much as you sew. 

13.  Enjoy the look of your bias binding.  


Hope you enjoyed this tutorial.  

XX,
Jasmine

P.S.  I will be linking up with some of the parties on my sidebar.  There is something fun for every day of the week. 

Friday, March 20, 2015

Over the River Mini Quilt


I finally finished the quilting on my mini quilt made with the scrap corners from my "Through the Woods" quilt.  I am calling it "Over the River."  My dad used to always sing, "Over the river and through the woods to grandmother's house we go" whenever going to his mother's house.  It still makes me smile when I remember.  The names for both quilts were inspired by the name of the Moda fabric line called "Into the Woods."

I always like seeing the difference quilting can make, and this time it seemed even more pronounced.  Here is a picture of the quilt top.


And here is a picture of the quilted top.


I love quilty texture on the front and back.  You can see that I quilted the side triangles like they were part of continuous feathers.  I wanted it to seem like the chevrons could go on and on.


I wanted to use my walking foot for the chevrons, so I quilted the whole thing on my little Pfaff.  It was my first time quilting feathers without the stitch regulator since I got my Tiara.


It turned out better than I thought it would.


I cut the binding out at 2.25 inches and sewed it to the top with a quarter inch seam.  Then I used the ladder stitch to sew it down on the back by hand.  It helped to preserve the points on my chevron.


The half square triangles finish at 3.5 inches.  Here it is in comparison to Through the Woods.


Mini Quilt Stats #18
Quilt Name: Over the River
Pattern: Chevron
Fabric: Into the Woods and Kona Snow
Amount: 1 yard
Batting: Hobbs 80/20
Size: About 21 x 21 inches
Date Finished: March 2015
What I learned:

  • Pressing half of the HST to the dark and half to the light yields better points on chevrons.
  • Quilting feathers in a chevron is so much fun. 
  • I love the contrast between the straight and feathered quilting.  

I am using it as a table topper in my kitchen right now, and it always makes me smile.

XX,
Jasmine

P.S.  I am linking up with some of the fun parties on my sidebar.  There is something fun for every day of the week.

Tuesday, March 17, 2015

Different Ways to Hang Quilts

{A Picture Heavy Post}


I love decorating with quilts.  I put them on beds, on tables, on the walls, and anywhere else I can think of.  ;-)  Anyone entering my house can immediately see that a crazy quilter lives here.  Today I thought it would be fun to show different ways I hang quilts on the walls.

One of my new favorite ways to hang quilts is on this drapery rod in my kitchen.


I love it because there is no need to add a hanging sleeve.  Just use the clips to hold it up.


I have also used other styles of drapery rods to hang quilts.  This one is in my basement.


The hangers just mount into the sheet rock, so it is not super secure.  However, I can still rotate the quilts I hang here.


We used  a small drapery rod to hang a mini quilt in Monkey's nursery.


One thing I don't like about this method is how far the little quilt hangs away from the wall.


In addition to purchased drapery rods, my handy husband has built many quilt hangers for me.  One of my favorites in this one in my living room.  It sits flush against the wall.


Which is really nice, because it is behind my front door.


He made it to the perfect size for all of my cover story quilts.  (Thimbleberries and my own designs ~ one quilt for each month.) There is a hinge which opens up and a groove in which a rod rests.  He even cut away some of the top board so no pressure is put on the quilts.


My husband also built this hanger which is in my stairway.


It is really nice, because he was able to mount it straight into the studs in the wall, but there is no shelf to collect dust.


Another one of his creations is in my craft room.  This one has a shelf I store my rainbow scraps on.


He was able to mount it to the studs through the back board on this one as well.  The rod just sets on the side pieces. This was the first quilt hanger he made for me ten years ago, and I still love it.


My mom loved this next quilt hanger so much that she had my husband build three of them for her.  Mine is in the basement hallway.


It also mounts into the studs and is really secure.  He drilled holes into the side boards for the rod to slide through.  Originally it was just a plain rod, but my boys kept bumping it and it fell down frequently.  So my husband cut the ends off and added these knobs which come on and off easily.  The rod no longer falls down and I can still rotate my quilts.


In some of the bedrooms we have quilts hanging up with just a plain dowel.


We used some Command Performance hooks to hang this one up.


The one on display in Monkey's room is a store bought blanket *gasp* which I added a hanging sleeve to.


This dowel slides in between a couple of push pins.  Whatever works, right?


And I will also admit that plain push pins are sometimes used for hanging quilts.


I have heard that used sewing machine needles would work even better for hanging a quilt like this.


Our newest way to hang a quilt was my hubby's idea.


He found these hooks at the hardware store that hold the dowel while staying hidden.


On my husband's quilt I used corner triangles and tabs with extra give to hold and hide the rod.  We used four of the hooks to hold the rod.


If you want the rod and the tabs to show, then you don't have to stitch them to the back.  (This is a little quilt I finished for a friend.  Her sister did the cross-stitch.)


And here's the back.


Most of the time I make a hanging sleeve with a little extra give on one side.  It helps the quilt hang straighter without rolling around the rod.  I sew one side in with the binding and stitch the other down by hand.  I usually cut the sleeves 6.5 inches wide and hem the sides.  Instead of ironing it in half, I will have one side be about a half inch wider (3 and 3.5).  It may look saggy, but it works great!


If I know it is going on an even thicker rod/dowel I may have an inch difference.


What is your favorite way to hang quilts?

XX,
Jasmine

P.S.  I will be linking up with Tips and Tutorials Tuesday, Let's Bee Social, and Can I Get a Whoop Whoop.  (Links on sidebar.)